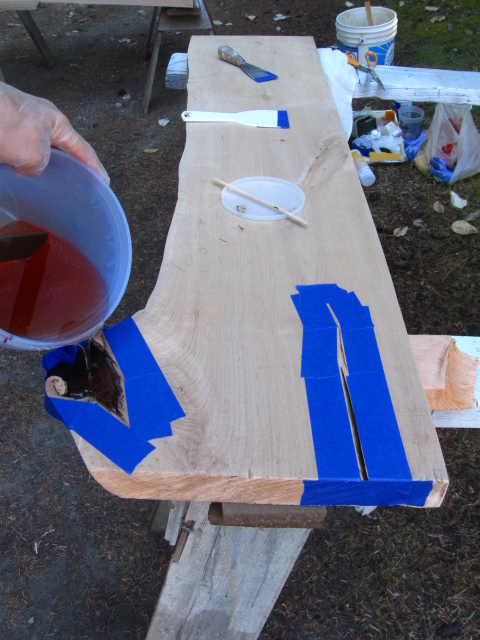
more tape removal, more scraping, more sanding, more dust blowing, and then the last round of epoxy for the table faces (I've actually been working on 3 but have only been showing mainly one, and there is some work to be done on the sides which require them to be flipped over). I have also been tinting the epoxy with 2 specialty dyes, red and yellow. Here are a few more pictures from this whole process today. Tomorrow I will repeat all this but flip and do what needs to be done on the underside. The artwork will truly begin next week! Probably by late next week you'll begin to see the structure of the tables coming together minus the art inlay.


2nd round of Epoxy...
So, what happened today? First i removed all the tape so I could scrape the epoxy down, and then I re-taped all the areas that would need topping up. Many thanks to Barry Chantal for his expert advice & tips on working with the epoxy! And... I 'm going to need to do one more round with the epoxy! Oh joy!


1st Round of Epoxy...
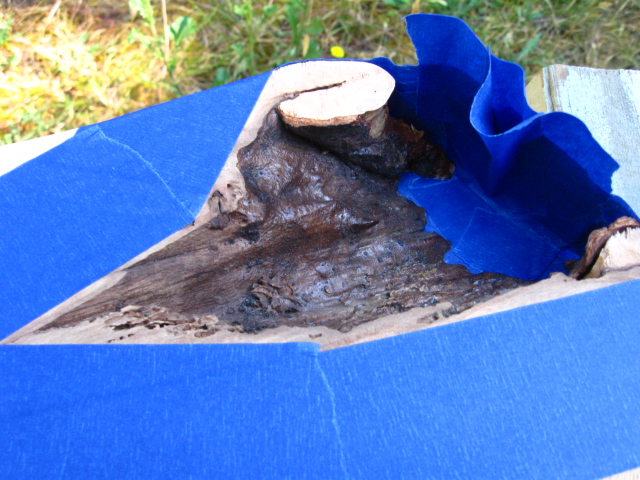
this is the 1st round of epoxy work on the alder planks, used to fill large voids in the wood. I created a "blue-tape" dam, mixed some specialty dyes into the epoxy to give it an amber look, and voila! I will need to repeat this tomorrow to get all the cracks leveled.


Sanding Alder planks...
sanding the 2 Alder planks that will make up the wood portion for my dining room table tops. The plexiglas inlay art will run down the centre of the table, probably about 8.5" wide, and then will be topped with tempered glass. Tomorrow i will build several dams for epoxy work and will post. This wood is going to be beautiful!!!